The HestiaCP control panel is distributed under the GPL v3 license and is based on the VestaCP project, which has not been supported for a long time. HestiaCP allows you to add new sites, work with mail and databases, cron, updates, a file manager, and the ability to add SSL.
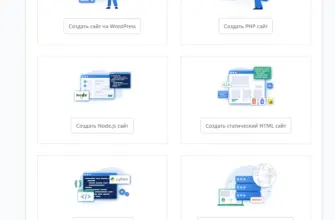
Important note: Before diving into the detailed instructions, let me remind you of an important rule: any control panel must be installed strictly on a clean operating system. If you are deploying this platform for review or testing purposes, a great solution is a quick VPS rental for experiments with hourly billing. If you need to quickly pick a platform for a specific stack (Nginx, Docker, or Git), an interactive configurator is available on the main page of the hub—a server control panel with handy filters.
- Hestia System Requirements:
- Pros of Hestia CP:
- Cons of Hestia CP:
- Step 1 – Choosing a VPS for Hestia
- Step 2 – Log in as a System User (root)
- Step 3 – Installing Hestia
- Step 4 – Nginx without Apache
- Step 5 – Installer Questions
- Step 5 – Configuring Hestia CP
- Step 6 – Setting Up a Secure Firewall in Hestia CP
- Step 7 – Switching PHP Versions in Hestia CP
- Step 8 – Working with Databases and phpMyAdmin in Hestia CP
- FAQ 1 – Changing the Maximum Upload File Size (upload_max_filesize) in Hestia CP
- FAQ 2 – How to Edit php.ini in the Hestia CP Control Panel
- FAQ 3 – How to Configure Remote Backup via FTP in Hestia CP
- FAQ 4 – Creating FTP Users in Hestia CP
- GnuTLS -15 in gnutls_record_recv: An unexpected TLS packet was received
- FAQ 5 – How to Reset Passwords in Hestia and Vesta
- FAQ 6 – How to Add a Self-Signed SSL Certificate in the Hestia CP Control Panel
- FAQ 7 – Installing IonCube Loader on Hestia
- Conclusion
Hestia System Requirements:
The Hestia server web control panel supports only 64-bit Linux operating systems: Debian 9, Debian 10, Ubuntu 16.04 LTS, Ubuntu 18.04 LTS, Ubuntu 20.04 LTS, Ubuntu 22.04 LTS. CentOS distributions are not supported.
Pros of Hestia CP:
- The panel is translated into Ukrainian and Russian;
- Built-in local backup system that starts working immediately after installing the web panel, and you can configure backups to an external FTP server;
- Advanced configuration for Fail2ban;
- Support for free Let’s Encrypt SSL certificates for websites;
- Simultaneous support for multiple PHP versions.
Cons of Hestia CP:
- No IPv6 support, and it is unknown when it will be available; the GitHub thread is dead;
- The firewall is open by default.
Step 1 – Choosing a VPS for Hestia
My choice in the VPS hosting sector fell on Aeza (AÉZA), and Quick VPS rental for experiments. It is nice that these providers value their customers and maintain favorable conditions even when base tariffs change. They offer a wide selection of configurations, allowing you to choose the best option for any need. In addition, they often run promotions and special offers for regular customers, which allows you to significantly save on server rental. They have excellent technical support that is always ready to help with any questions.
The operating systems used to write this Hestia installation review: Ubuntu 20 LTS, Ubuntu 22 LTS.
Step 2 – Log in as a System User (root)
You will need to connect to your server as root, either directly from the console or remotely using SSH.
Update the operating system, check the computer name, locale, and time. Usually, it is enough to simply update the distribution with the following commands:
# apt update; apt upgradeand add a few system utilities:
# apt install lsb-release htop net-toolsAlso, check the computer name using the hostname command with the -f switch. The server name must match the FQDN; simply put, if you can access the server using its name (not its IP) via the SSH protocol, then it is OK. Of course, if you plan to use a full-fledged mail server, you need to perform additional checks — study the checklist for configuring a Linux VPS/VDS or dedicated server from scratch.
Step 3 – Installing Hestia
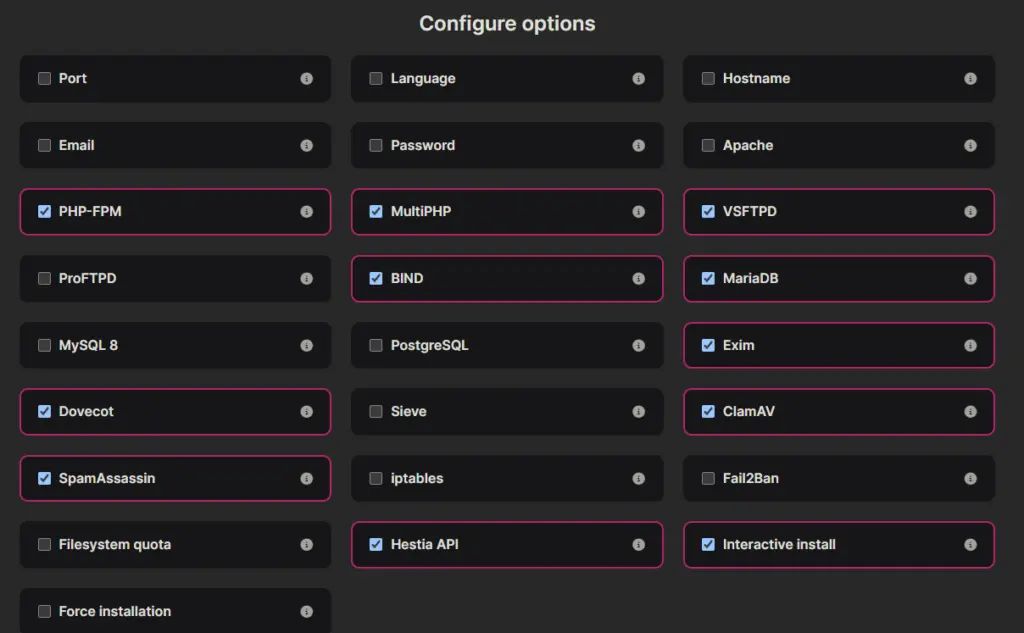
Recently, an installer configurator appeared on the Hestia website. Very convenient! Therefore, I rewrote this part. For example, I disable the installation of iptables support (to use UFW peacefully) and do not install Fail2Ban since my SSH port is open only for my VPNs, and Fail2Ban is ineffective for other blockings (it is especially “fun” to watch Fail2Ban eat up all resources on a weak VPS).
cd /root; wget https://raw.githubusercontent.com/hestiacp/hestiacp/release/install/hst-install.shTo run the installer with default parameters, use the command:
# bash hst-install.sh
Welcome to the Hestia Control Panel installer!
To run the Hestia installer with parameters from the installer configurator:
bash hst-install.sh --apache no --iptables no --fail2ban noIf for some reason you need to change the default parameters, you can use a command like this:
bash hst-install.sh -f -y no -e [email protected] -p p4ssw0rd -s hostname.domain.tldStep 4 – Nginx without Apache
The script for manual upgrade from Nginx + Apache2 + PHP-FPM to Nginx + PHP-FPM.
Step 5 – Installer Questions

After running the installer and reaching Step 4, I received a warning that Hestia does not support iptables for beginners: Simple firewall management with UFW.
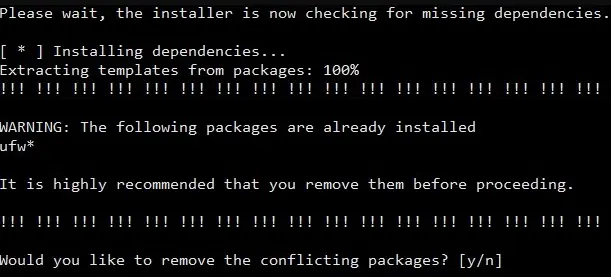
Since I am actually used to working directly with iptables, I confirm the removal of the ufw package. WARNING: The following packages are already installed
ufw*
Would you like to remove the conflicting packages? [y/n] y
The next step will show which components Hestia will automatically install. Review them and confirm by pressing Y.
         _   _           _   _        ____ ____
               | | | | ___  ___| |_(_) __ _ / ___|  _ \
               | |_| |/ _ \/ __| __| |/ _` | |   | |_) |
               |  _  |  __/\__ \ |_| | (_| | |___|  __/
               |_| |_|\___||___/\__|_|\__,_|\____|_|

                          Hestia Control Panel
                                  1.3.2
                            www.hestiacp.com

========================================================================

Thank you for downloading Hestia Control Panel! In a few moments,
we will begin installing the following components on your server:- NGINX Web / Proxy Server
- Apache Web Server (as backend)
- PHP-FPM Application Server
- Bind DNS Server
- Exim Mail Server + ClamAV + SpamAssassin
- Dovecot POP3/IMAP Server
- MariaDB Database Server
- Vsftpd FTP Server
- Firewall (Iptables) + Fail2Ban Access Monitor
========================================================================


Would you like to continue with the installation? [Y/N]: Y- In the next step, enter the administrator email (Please enter admin email address)
- Enter the computer name (Please enter FQDN hostname)
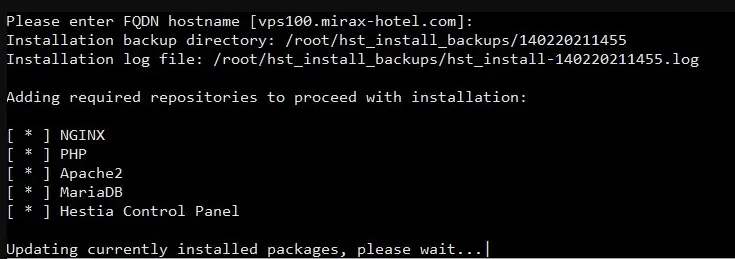
At the end, the script will output a link (Admin URL), a username, and a password for panel management, and will prompt to reboot the server. Copy this access data and reboot the server.
That’s it! The Hestia CP installation is complete. Further management of the Hestia CP web panel is done via the web interface (Admin URL) using port 8083.
You can check the operation of the hestia daemon using the lsof command:
# lsof -i:8083
COMMAND   PID  USER   FD   TYPE DEVICE SIZE/OFF NODE NAME
hestia-ng 522  root    6u  IPv4  19159      0t0  TCP *:8083 (LISTEN)
hestia-ng 523 admin    6u  IPv4  19159      0t0  TCP *:8083 (LISTEN)
Step 5 – Configuring Hestia CP
Follow the Admin URL link, and enter the username and password to log in to the interface.
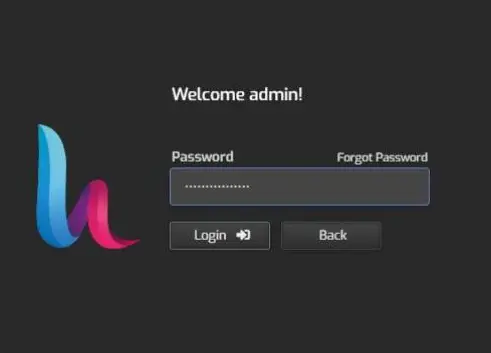
And this is the interface we see.
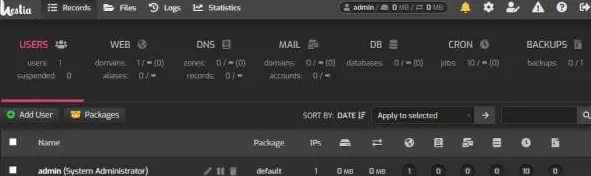
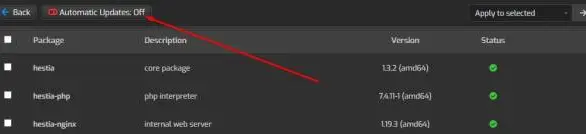
And immediately turn off the automatic update of the Hestia panel, because the consequences of an uncontrolled update without a backup can take a long time to sort out. To do this, go to Server -> Updates and click the Automatic Updates button.
Step 6 – Setting Up a Secure Firewall in Hestia CP
A secure firewall is a firewall where everything is forbidden by default.
Let me remind you that earlier Hestia maliciously:) deleted UFW, and I hoped that iptables would be configured correctly out of the box. But no, rules for certain ports were written and fail2ban was configured, but the default rules were open. Let’s see the default firewall rules after installing Hestia using the iptables command with the -nL -v flags:
iptables -nL -v
Chain INPUT (policy ACCEPT 7166 packets, 1063K bytes)
 pkts bytes target     prot opt in     out     source               destination
 3325  773K fail2ban-HESTIA  tcp  --  * * 0.0.0.0/0            0.0.0.0/0            tcp dpt:8083
   21  1324 fail2ban-MAIL  tcp  --  * * 0.0.0.0/0            0.0.0.0/0            multiport dports 25,465,587,110,995,143,993
    0     0 fail2ban-FTP  tcp  --  * * 0.0.0.0/0            0.0.0.0/0            tcp dpt:21
  928  101K fail2ban-SSH  tcp  --  * * 0.0.0.0/0            0.0.0.0/0            tcp dpt:22
 7476 1220K fail2ban-RECIDIVE  tcp  --  * * 0.0.0.0/0            0.0.0.0/0            multiport dports 1:65535

Chain FORWARD (policy ACCEPT 0 packets, 0 bytes)
 pkts bytes target     prot opt in     out     source               destination

Chain OUTPUT (policy ACCEPT 7858 packets, 6693K bytes)
 pkts bytes target     prot opt in     out     source               destination
After studying the firewall configuration files /etc/iptables.rules and /usr/local/hestia/data/firewall/rules.conf, I concluded that the settings are correct, but they were only partially loaded. Using the iptables-restore command, we reload the rules from the /etc/iptables.rules file.
# iptables-restore /etc/iptables.rulesAfter this, incoming packets began to be blocked by default, and additional rules were loaded. However, rebooting the server shows that the insecure allowing rules are restored!
Lifehack: When installing Hestia, disable support for iptables and Fail2Ban modules, and then use UFW peacefully.
Step 7 – Switching PHP Versions in Hestia CP
The feature to switch PHP versions for a specific site should be present in every hosting control panel because each CMS imposes its own requirements on the PHP interpreter version.
So, let’s check if the PHP switcher works in Hestia CP. After installing Hestia, I uploaded a phpinfo file. PHPinfo showed that I had PHP version 7.4.15 installed.
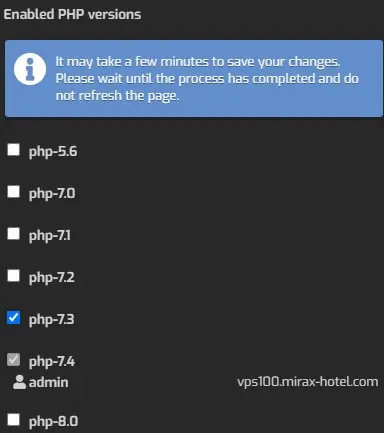
Now I want to install support for PHP version 7.3, which is required, for example, by the DataLife Engine (DLE) engine (DLE does not work on PHP 7.4).
I go to the Server -> Configure -> Web server menu, scroll down to the Enabled PHP versions section, and check the box next to the PHP version I need. I click the Save button. The developers warn: “Saving changes may take a few minutes. Wait for the process to complete and do not refresh the page.”
We wait for some time with a cup of tea. The page refreshes. Go to the settings of the test site and in the “Backend Template PHP-FPM” section, select the required PHP version.
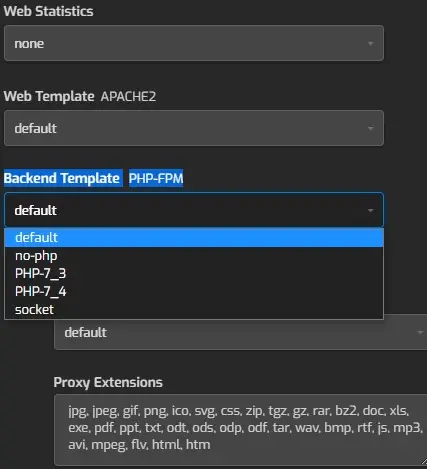
Click the Save button and refresh the page displayed by the phpinfo file.
And yes, indeed!!! I see PHP Version 7.3.27-2+ubuntu20.04.1+deb.sury.org+1. Thank goodness! I really didn’t just waste time studying this panel and I can say the HestiaCP panel is ready for work and is a good product. Recommended for use on VDS/VPS Zomro.
Step 8 – Working with Databases and phpMyAdmin in Hestia CP
You can manage databases in the section of the same name — DB. To create a database, click “Add DB”. The panel will prompt you to fill in the fields:
- Database — the name of the database. The prefix admin_ will be automatically added to the entered value.
- Account
- Password — can be entered manually or generated
- The rest can be left untouched
Save changes using the button on the right side of the operation row.
You can work with the database contents in phpMyAdmin. The login button is located in this same section, and it is also accessible via a direct link — http://IP/phpmyadmin/ If the link with the IP address does not work, use the first domain added in the panel instead. To log in, you will need the database username and password.
If you want to connect to the database remotely, for example, from your computer, allow connections to port 3306 in the panel’s firewall and edit the /etc/mysql/mariadb.conf.d/50-server.cnf file, replacing the value in the bind-address line with 0.0.0.0.
FAQ 1 – Changing the Maximum Upload File Size (upload_max_filesize) in Hestia CP
Usually, without using server control panels, limits are changed in php.ini using any convenient console text editor, such as Nano or vim.
But we have a panel, so let’s find out how to increase the maximum upload file size via HTTP using PHP in Hestia CP:
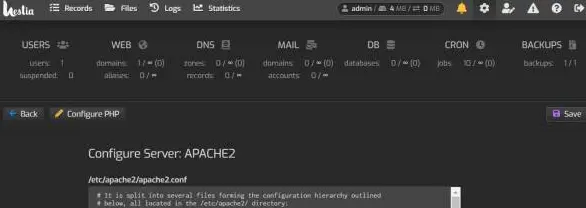
- Go to the “Server” tab (“Settings”), select the “apache2” web server item, and click the “Edit” button.

- Next, click the “Configure PHP” button.
- In the fields that appear, there will be an “upload_max_filesize” line; instead of 2M, you can set any desired size.
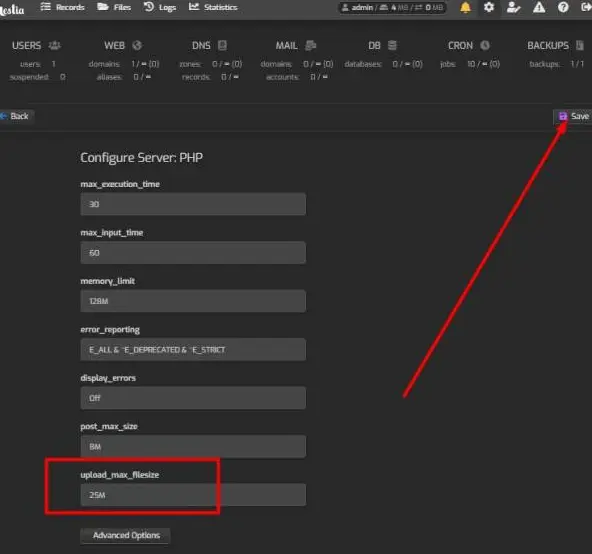
Do not forget to click the “Save” button. In this example, I allowed uploading files up to 25 Megabytes.
FAQ 2 – How to Edit php.ini in the Hestia CP Control Panel
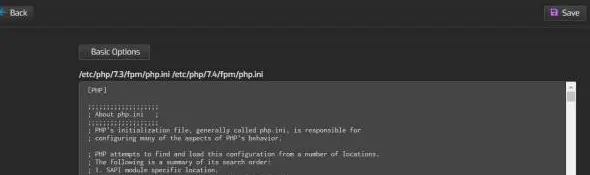
To edit php.ini in the Hestia CP control panel, see the example above. There, at the very bottom of the page, is an “Advanced Options” button. Clicking it opens the php.ini file for editing.
FAQ 3 – How to Configure Remote Backup via FTP in Hestia CP
Important! Backups are initially created on the local server, and only then are they copied to the remote server via FTP or SFTP.
In order to store data on a remote server, Hestia supports backup to an external FTP server.
- In the first step, configure access to the external FTP server. To do this, go to the top menu Server → Configure → Backups (“Server Settings → Configure → Backups”). This is also where the tab for Local Backup storage settings is located.
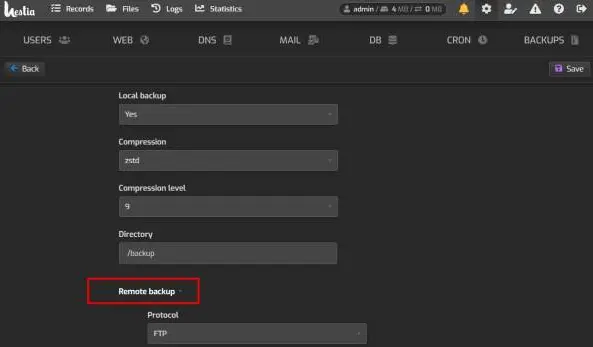
- Go to the menu and open the “Remote backup” tab, then fill in all fields: “Protocol” – choose the protocol configured on your backup server – ftp or sftp (default is ftp). “Host” – FTP server address. “Port” – FTP server port. “Account” – FTP server username. “Password” – user password. “Directory” – specify the path to the folder where to save server backups (specify the path from the server root, like in Vesta /home/backup/).
- For backups to run automatically, a configured task in CRON is required. By default, backups occur at 5:10 AM server time. But if you want to change the launch settings, you should find the v-backup-users script on the CRON page and click the configuration button.
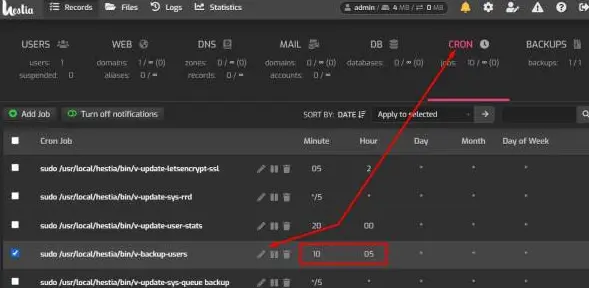
I recommend creating backups during the night, as creating copies increases the server load, which might cause websites to open with delays.
By default, the control panel creates backups daily and retains “1 copy”. To change the number of retained copies, go to the Users -> Packages section. Initially, there is 1 package named default. Go into its settings and specify the required number of backups.
A website backup in Hestia CP consists of:
- Website source files, their certificates, Nginx configurations, and the Hestia control panel settings for each domain.
- Configuration files of the system profile on the server.
- MySQL database dumps and their system settings.
- The user’s Cron file.
If you log into the control panel as Admin, backups will be performed by default for all users created in the control panel.
To back up only the necessary parameters, select the Exceptions tab. Next, select the Edit Backup Exceptions tab. Fill in the fields that appear and specify the necessary exceptions; this means that the specified folders, databases, etc., will not be included in the backup. To apply the settings, click the Save button.
Next, to create a backup with the specified parameters, click the Create Backup button.
To restore information from a backup, click the Restore button next to the required backup in the Backup tab. In the window that opens, select the specific items to restore or choose Restore All by clicking the corresponding button.
FAQ 4 – Creating FTP Users in Hestia CP
Hestia CP, just like Vesta CP, uses the vsFTPd server to set up FTP connections.
- Log into the panel under the user who owns the required domain.
- Go to the WEB section, hover over the domain field, and click Edit.
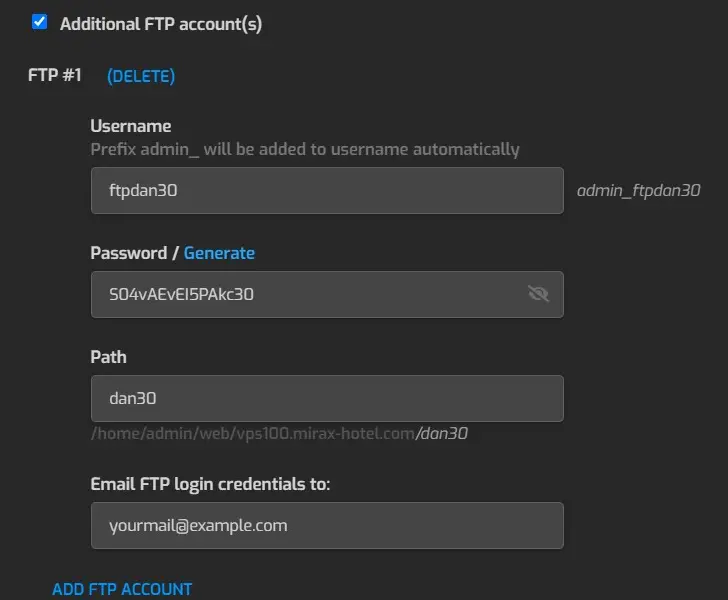
- In the settings list, check the box for “Additional FTP account(s)” and enter the data:
- Click Save.
- Account — the login of the user being created, which they will use to connect via FTP.
- Password — enter or generate an access password for the user being created.
- Path — the directory to which the created user’s access will be restricted. By default, access will be granted to the home directory of the current domain, and in this case, you do not need to specify a path. If you need to grant access to another directory, the path to it must be specified relative to the site’s home directory: for example, to grant access to /home/user1/web/mydomain.com/public_html, enter /public_html in this field.
- Send FTP account credentials to address — you can immediately send the username and password of the new user to their email. Optional field.
GnuTLS -15 in gnutls_record_recv: An unexpected TLS packet was received
When connecting with the Filezilla client using the received access details, we get an error:
Error: GnuTLS error -15 in gnutls_record_recv: An unexpected TLS packet was received.We Google it, read, and still don’t understand 🙂
There are many complaints that the vsftpd FTP server writes nothing to the logs, and generally doesn’t get along well with logs (How to view user logging errors on a vsftpd FTP server?). The complainers are right to some extent, and vsftpd indeed does not spoil us with logs.
The only way out is to disconnect the informational pacifier of Google queries and turn on common sense. In the previous step, I created an FTP user, but NOT in the standard directory, but in a subdirectory. Let’s look at my FTP user settings in /etc/passwd:
# nano /etc/passwd
admin_ftpdan30:x:1000:1000::/home/admin/web/vps100.mirax-hotel.com/dan30:/usr/sbin/nologin
We see chroot is configured for the directory /home/admin/web/vps100.mirax-hotel.com/dan30. Let’s check if this directory exists using the ls command:
# ls /home/admin/web/vps100.mirax-hotel.com/dan30
ls: cannot access '/home/admin/web/vps100.mirax-hotel.com/dan30': No such file or directory
We see that the directory is not created, meaning HestiaCP, just like Vesta, does not create the directory automatically.
This means we create the necessary directory manually and set the correct permissions with chown admin:admin dan30.
That’s it, everything is ready to work!
FAQ 5 – How to Reset Passwords in Hestia and Vesta
Sometimes, the task arises to reset the access password to the Hestia or Vesta panel.
- To reset the Vesta password, use the command:
/usr/local/vesta/bin/v-change-user-password USER PASSWORD- To reset the Hestia password, use the command:
/usr/local/hestia/bin/v-change-user-password USERFAQ 6 – How to Add a Self-Signed SSL Certificate in the Hestia CP Control Panel
Creating a self-signed certificate using openssl:
openssl req -x509 -newkey rsa:4096 -keyout key.pem -out cert.pem -nodes -days 365 -subj '/CN=localhost'where:
- -newkey rsa:4096 — Create a 4096-bit RSA key.
- -keyout key.pem — Save the key to the key.pem file.
- -out cert.pem — Save the certificate to the cert.pem file.
- -nodes — Do not protect the private key with a password.
- -days 365 — Number of days the certificate is valid.
- -subj ‘/CN=localhost’ — Use this option to avoid questions about the certificate contents. Replace localhost with your domain name.
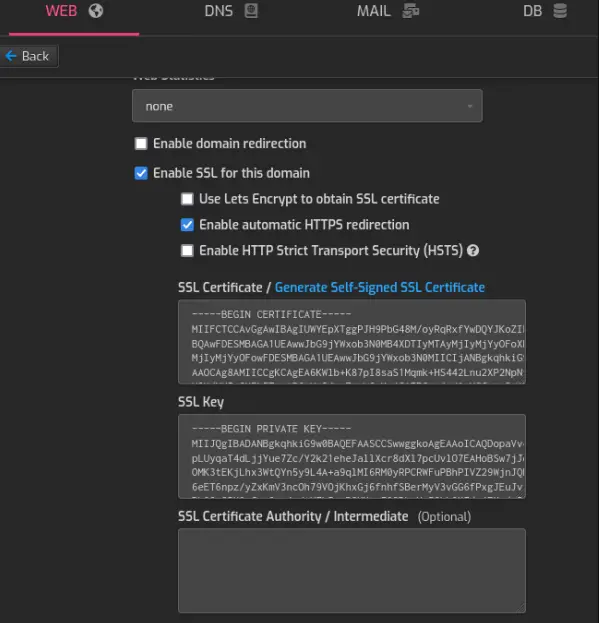
To configure the SSL certificate, go to the “WEB” tab. In the new window, find the “SSL Support” item and enter the data from the certificate created with openssl. Paste the contents of the cert.pem file into the first box, and the contents of the key.pem file into the second box.
FAQ 7 – Installing IonCube Loader on Hestia
IonCube Loader is a frequently required PHP extension and is described in detail in the article Installing and enabling IonCube in PHP on hosting.
The Hestia developers simplified the task of installing IonCube on their panel and created a simple bash script automating the process. To download and run the script, use the commands:
wget https://raw.githubusercontent.com/jaapmarcus/ioncube-hestia-installer/main/install_ioncube.sh
chmod +x install_ioncube.sh
./install_ioncube.sh
Conclusion
Hestia is a very high-quality, simple, and moreover, free panel. To avoid putting them into separate steps, here are a few notes when working with HestiaCP:
- Update the operating system using standard methods via the console with the apt utility.
- Do not forget to configure secure SSH. I have a rule to deny access to the root user. In principle, Fail2ban is configured correctly in Hestia, and if you have a strong password, you can leave the SSH daemon settings untouched.
If the configuration or capabilities of this specific panel did not suit you, you can return to the main page to continue choosing a control panel. There, we deployed an interactive configurator table: with its help, you can filter all available software by Nginx/Apache support, license type, availability of backups, or WordPress/Docker integration in one click.
I hope you found this guide helpful. Let me give you one more piece of important advice: if you have installed any panel on your server, try to make all subsequent changes and site additions only through its web interface! Use the SSH console for manual editing of configuration files only in the most exceptional cases, otherwise you risk disrupting the internal operating logic of the software.
 Top Temporary VPS for Testing & Experiments (2026)
Need a fast cloud server for a few hours or days? Deploy an isolated testing environment, run your scripts, and destroy it without any monthly commitments. Secure payments via Crypto (USDT) & PayPal supported.
• Exclusive Welcome Bonus: Get an extra 15% on your first balance top-up within 24 hours after registration.
• Best-in-class Storage VDS configurations with huge disk space for heavy data testing.
• High-speed hardware platform with a stable presence in the Netherlands (Europe).